Tag Archives: cleaning

Daily Checklists to Teach Children to Manage Money

Standard
Daily Checklists to Teach Children to Manage Money

When our older two kids were younger, I struggled with the idea of simply giving children an allowance (for doing nothing) or paying them to do certain chores (I don’t struggle with that anymore). I believe our children should contribute to the care of their home because they are a part of our family, but they are also entitled to a small portion of our income because they are a part of our family.  I wasn’t sure how to manage the children’s chores and allowance until I found an interesting blog through Pinterest. 

I love searching Pinterest for anything having to do with crafts, school, health, and food.  I sometimes use Pinterest instead of Google because I know I will be more likely to find the desired information.  One such search directed me to 71 Toes and their weekly checklists for children.  The concept is fairly simple.  Each child has a checklist of tasks to complete each weekday.  If they complete all of their tasks for the week, they will receive their age in dollars on Saturday or Sunday.  If they fail to complete one or two tasks, they will receive half of their age in dollars.  They will receive no money for not completing three or more. They are allowed to memorize a scripture verse or passage (parent’s choice) to make up for one task.


The four areas of tasks are as follows. 

  • Morning work:  make bed, pick up bedroom floor, brush teeth, eat breakfast, get ready to go (if necessary)
  • Reading:  read for a minimum of 15 minutes each day
  • Practice:  practice something for at least 15 minutes each day (examples below)
  • Zone:  clean one area of the house (see below)

Practice can be as simple as writing a letter to a friend or loved one, playing a game (Scrabble, Quirkle, Monopoly, Dominoes, Yahtzee, Uno, etc.), playing an educational game on a computer or iPad, practicing flash cards, or practicing spelling words.  Big Brother plays baseball and practices hitting with a pitching machine.  Big Sister used to practice her cartwheels at home for gymnastics.  The little girls practiced painting (fine motor skills) with Grandmother yesterday.  My kids usually check with me first to make sure something will count for their practice before they start.  As long as I can see some developmental or educational value in their activity, I usually approve–unless they want to do something extremely messy or that will require me to be involved for an extended period of time. 

We have only recently developed the zone into something that works well for our family.  At first, I only had the two older children completing checklists, so we only had two zones, which were usually 1) pick up the living room and 2) pick up the game room.  Those were the days when the twins were babies/toddlers and the floors were their playground.  When the twins were a little over three, we tried the checklists, but they were a little young to understand the concept.  They would complete a zone together, usually with my help.  I came up with five different chores that need to be completed more than once a week and put them on a wheel that I rotate on weekdays to give each child a new zone.  Today, the twins decided they each want a separate zone to complete on their own, so I have to create a new wheel.  


I started out with each child (the older two at the time) having a checklist on a half-sheet of paper like the mom at 71 Toes, but I didn’t want to tape or tack the sheets to our brand new (at the time) walls.  I created a family command center around this time and used a magnetic clip to display their sheets on one sheet of paper.  Once the twins wanted a checklist, I found a way to fit all four on one sheet.  They are small, but it’s easy to see who has empty boxes at a glance. 


 The purpose of the checklists is to teach children how to manage their money.  Big Brother can earn up to $10 a week.  He must save 10% and give 10% to our church, so he has a check register where we record his savings each week, and we keep that cash for him.  Big Sister can earn up to $8 each week.  She loves Starbursts and bubble gum, but she must buy those things with her own money, so she has to budget, save, and figure out tax on her purchase.  The little girls quickly learn that $3 doesn’t buy much, so they are learning the value of a dollar.  The family from 71 Toes requires their children to pay for half of all their clothing (except underwear, socks, and Sunday dress clothes) once they reach the age of twelve.  We haven’t reached that point yet, so I’ll update when we figure out if that will work for our family.  

I’m sure I have forgotten something to explain about this system, but you can ask me questions in a comment or go to 71 Toes to read her explanation and see what they do differently.  This is a wonderful system that works well as long as you (the parent) remember to have cash (plenty of ones) every weekend. Otherwise, your kids feel like they aren’t being rewarded for their checklists and quit completing their tasks.  (I know this from personal experience.) 
Little Mess-Makers

Standard

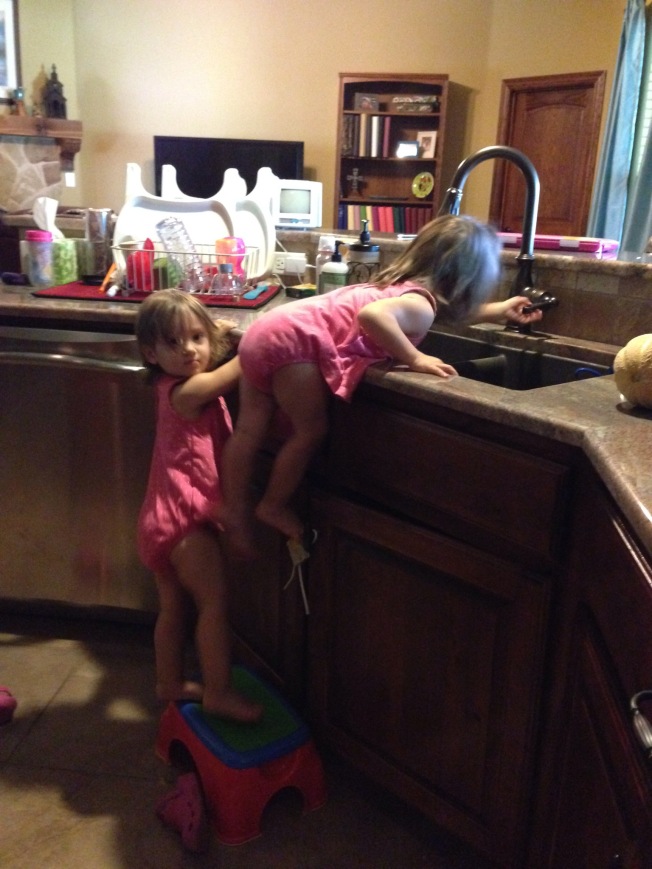
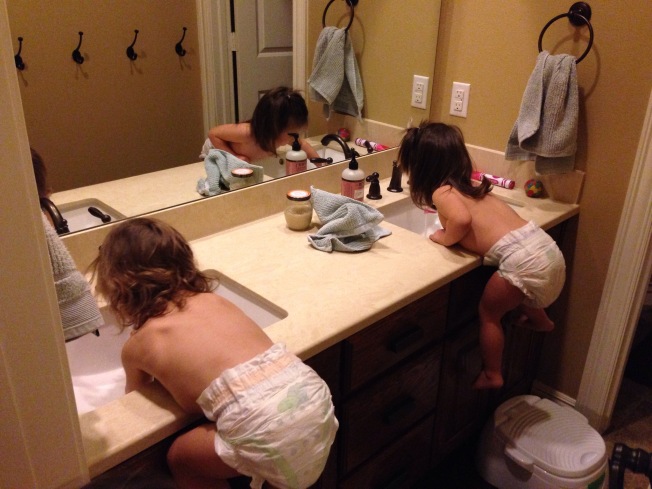
The twins are keeping me on my toes these days. I was sweeping up their cracker crumbs around the table yesterday while they were shaking their straw cups upside-down and getting milk all over the floor in the kitchen. I can’t let them out of my sight for a minute or they will be playing in the bathroom sinks, climbing the pantry shelves to help themselves to snacks, taking their clothes and diapers off, doing the laundry for me, climbing on everything, emptying an entire container of baby wipes on the floor one by one, and the list goes on! They are a mess!

IMG_7583.JPG

IMG_7581.JPG

IMG_7580.JPG
I recently purchased some new cleaning cloths from a company called Norwex, and I have been very pleased with how well they clean up the girls’ messes, and the cloths never get moldy or stinky because they have micro silver in them, which prevents bacterial growth. The cloths are designed to be used with just water (no chemicals), so I can clean anything with the same cloth. I just wash it out at the sink and reuse it. The kids can help me clean, and I don’t have to worry about them using harmful chemicals.

The twins were sick last week, and they enjoyed sitting in our dining room chairs while looking out the window, but that meant I needed to disinfect the chairs and window ledges. I normally use vinegar to disinfect, but I thought I’d try the Norwex cloths because they kill germs as well. I started wiping the arm rests on one chair and noticed the wood getting lighter immediately. We purchased our dining room furniture eleven years ago from an antique store. The furniture was made in the 1920’s, so it has 90 years’ worth of oil and grime layered on its surfaces. I have dusted it with polishes, cleaned it with antique furniture cleaner, nourished it with orange oil and coconut oil, but all of my efforts never removed any of the buildup. Just a few swipes of a damp EnviroCloth removed more in a few seconds than all of the things I’ve used over the past eleven years. Here are the before and after photos of the second arm rest.

IMG_7523.JPG

IMG_7526.JPG
Can you believe the difference?!? I just wiped a little coconut oil over the wood with a dry cloth and cleaning since the EnviroCloth was damp. One of the best things about using the cloth with just water is being able to use it with my twins hanging on my legs or sitting on my hip. No bottles to hold or keep out of their reach. No worries about them touching the chairs before I wipe chemicals off the surface. Here are some more before and after photos of the top of a chair.

IMG_7538.JPG

IMG_7540.JPG
Here is a photo of the top of a chair where I cleaned only the left half, so you can see the difference.

IMG_7563.JPG
As much as I love the EnviroCloth, the window cloth is amazing at leaving glass clean and streak-free with just water. My other favorite is the body cloth, which I have been using to clean my face each night. I had been using facial wipes, but I didn’t like the film they left on my face. I would still rinse my face after using one. Plus, they were cold, which isn’t good for cleaning pores. I run the body cloth under hot water, wring it, and press it gently on my face. It cleans all my makeup and water-resistant mascara off with no cleansers. Plus, it feels like a mini facial, and I will save a ton of money because I won’t ever need to buy facial wipes or cleansers again.

I’m sorry for the huge plug for this business, but I’m excited about the results I’ve seen. I am not a consultant with Norwex and have no plans to join, but I’m having a party soon and wanted to share the results I’ve seen from using these products in case you are interested in cleaning your home more easily, more quickly, and with fewer chemicals. All friends and family are welcome to come to the party. Just let me know if you want me to send you the details, or anyone can order online if you want. I’ll have to send you the link for that.

New Uses for Coconut Oil

Standard

Coconut oil is great for cooking, but I use it more frequently for a myriad of other uses. I buy the 54 ounce jar at Costco and put smaller amounts in Tupperware containers for using outside of the kitchen. I keep some in my bathroom to use on my skin after showering (in lieu of costly natural lotions), and I had another container in my twins’ bedroom to use on Little Sister’s eczema during the colder months. The Carrington Farms brand is cold pressed, unrefined, organic, and has a great price at Costco. This blog has well-researched information about this brand of oil, and I’ve always been pleased with the quality and taste of the oil.

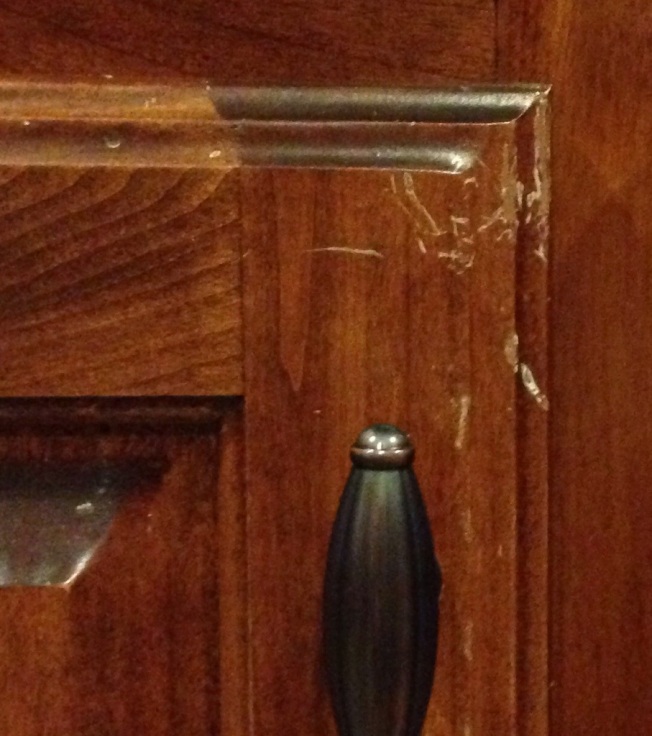
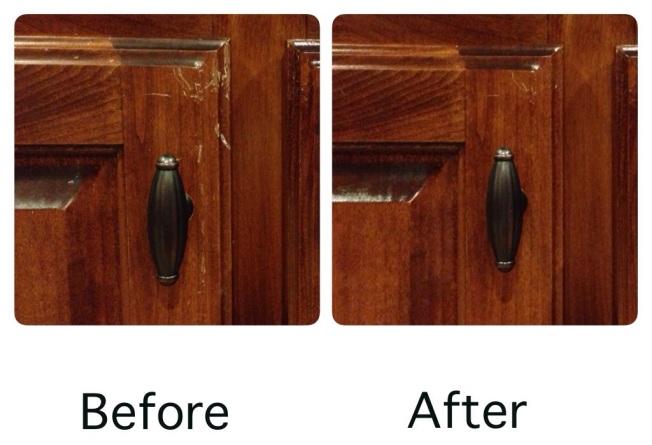
Recently, I read this blog post on how to refinish furniture with coconut oil, and decided to give it a try on our kitchen cabinets. We have only been in this house for twelve months, but our kitchen cabinets are made of knotty alder, which is a softer wood than oak. We loved the look of the wood when the cabinets were new, but it didn’t take long for them to get terribly scratched, nicked, and scuffed. 20140610-221924-80364979.jpg I figured if coconut oil worked on an old table, it could help my scratched cabinets too. I was amazed at the difference.

20140610-224758-82078494.jpg
After I saw how great this cabinet door looked, I started using coconut oil to clean and repair the rest of the cabinet doors. I don’t mind using this while the babies are running around because the oil won’t hurt them at all and could even moisturize their skin.

20140620-162501-59101813.jpg
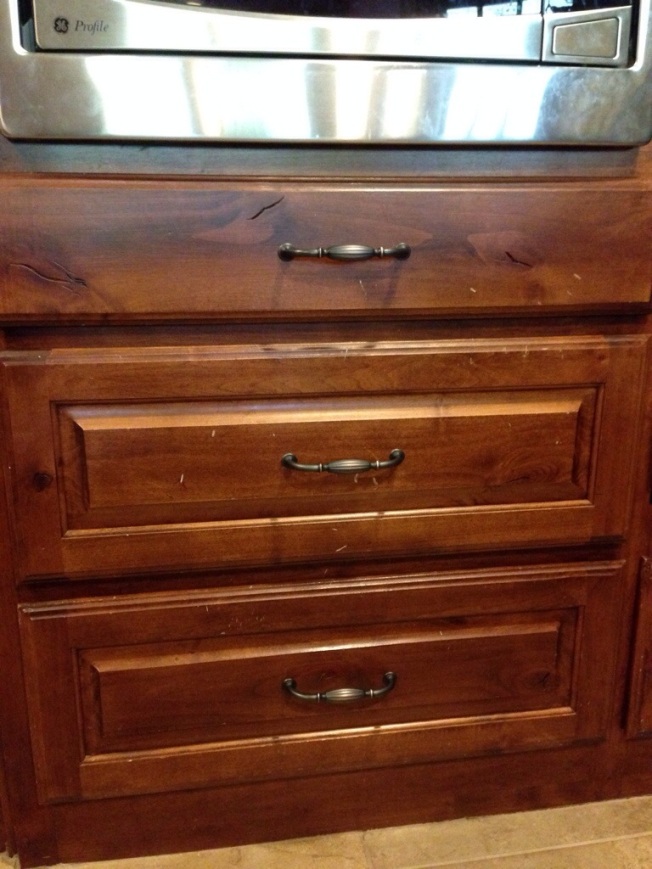
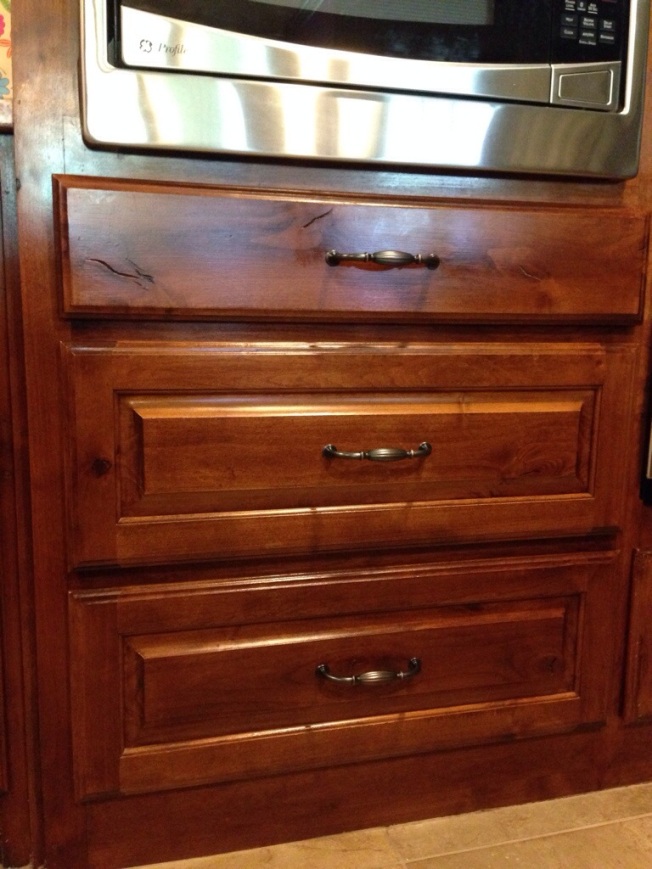
These drawers have taken a beating. When the babies started crawling around the house, I put a small dowel rod vertically through all the handles to keep them out. Hubby didn’t like that, so I removed everything from the bottom two drawers, and the girls climbed in and out. They love to play in those drawers! One day I will get them back. I digress. Anyway, the reason he didn’t like the dowel rod in there was because the drawers were getting scratched as you can see in the photo above. He was so upset over how easily scratched our cabinets were that he wanted to replace them. It’s a good thing I learned how to fix them. Here is what the drawers look like now. Beautiful again.

20140620-163029-59429154.jpg
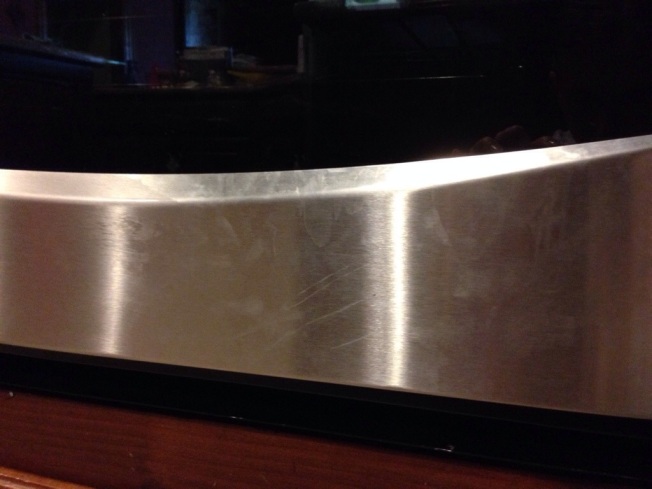
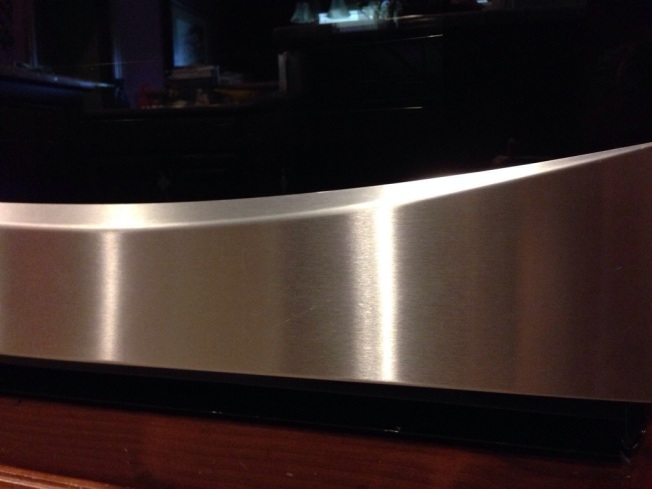
I read several months ago that you can use baby oil on your stainless steel appliances to remove finger prints, but I don’t ever buy baby oil, so I hadn’t tried it. I hadn’t ever thought about using coconut oil until I had it on my cloth right there under the microwave. It worked well on stainless steel too! Here are before and after photos of the oven door.

20140620-163352-59632656.jpg

20140620-163408-59648388.jpg
This is not a terribly time-consuming project unless you are type A and have to finish the whole room at one time. I have been taking my time and working on the worst cabinets first. I have been using a clean spoon to get a scoop of oil out and just set it on my counter while I work below it. One spoonful of oil will do several doors. I take a clean paper towel and get a grape-sized amount and smear it over the scratches and then wipe to cover the whole door–inside and out. After everything has been covered, I use a clean cloth to remove any excess oil and buff the wood. I have found that the coconut oil not only moisturizes and repairs scratches, it also cleans the little milk splatters and water marks. I think my cabinets look better now than they have since we moved in. I can’t wait to try this on our antique dining room furniture, but I should really finish the kitchen first.